Create your own cake costs spreadsheet: tutorial

I’ve talked recently about tracking your numbers in your cake business and why that is important.
To recap - if you don’t have a clear picture of what your business income is, how can you grow?
I covered some of the main reasons why keeping track of your numbers in business can make your life so much easier. You will avoid freaking out when tax return season come along, you will be able to forecast your profit and income over the year ahead, you will be able to keep track of your time and, finally, you will be able to get goals based on your current business situation.
Now I’m going to break down one particular element of your business, and show you how you can start building your own template library that will save you lots of time in the future.
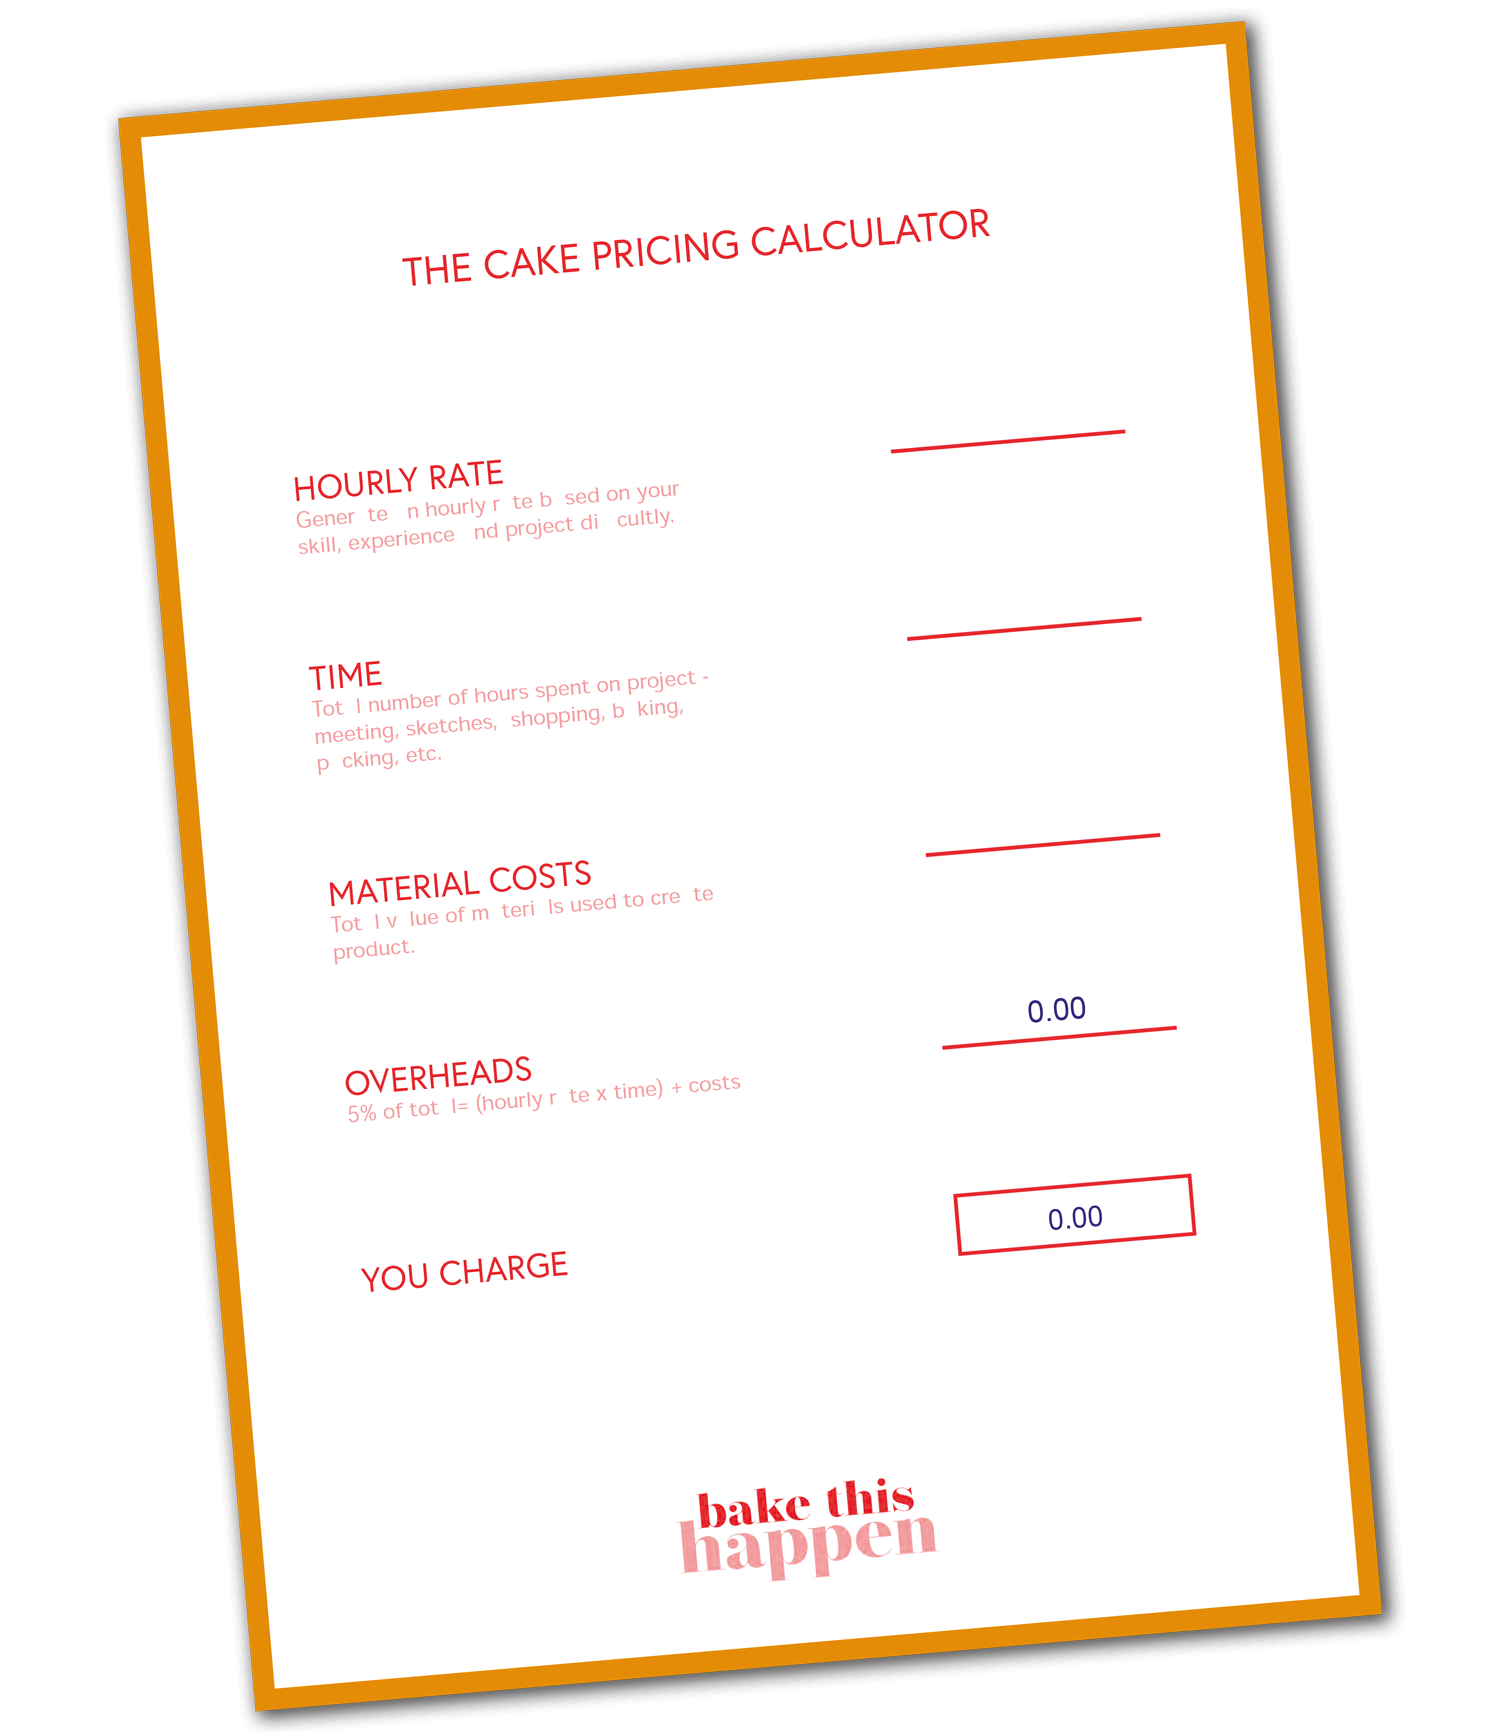
We talk about pricing your cakes all the time around here, and to truly get a handing on what to charge for your cakes, you need to know exactly how much they are costing you. That is why it is important to create a record of how much each type of cake costs to make, and a spreadsheet can make this process really simple. If you invest a little time to create the template, it will simply be a case of entering your ingredients, maybe updating some ingredients prices, and you’ll know the cost of your product.
By using a spreadsheet, instead of just guesstimating your costs by looking at your latest supermarket receipt you can be sure you will get accurate figures. Using this method you can also update the costs easily if ingredients change, or if you are making a larger or small version of the same recipe. By entering the price per packet, and adding a (copy and paste-able) function to the spread sheet, you can find out how much a certain amount of that ingredient will cost.
This definitely sounds more complicated than it is so let’s just get started!
Don’t want to spend time creating your own spreadsheets?
Get this exact pre-made spreadsheet and many more in the Cake Pricing Plus pack in my shop
STEP 1
Open your spreadsheet software of choice, create a new blank sheet and name it cake costs. On PC’s this is usually Microsoft Excel, on Macs I believe the program is called Numbers, but if you want a free online option I recommend Google Sheets, which is what I am using in this tutorial.

STEP 2
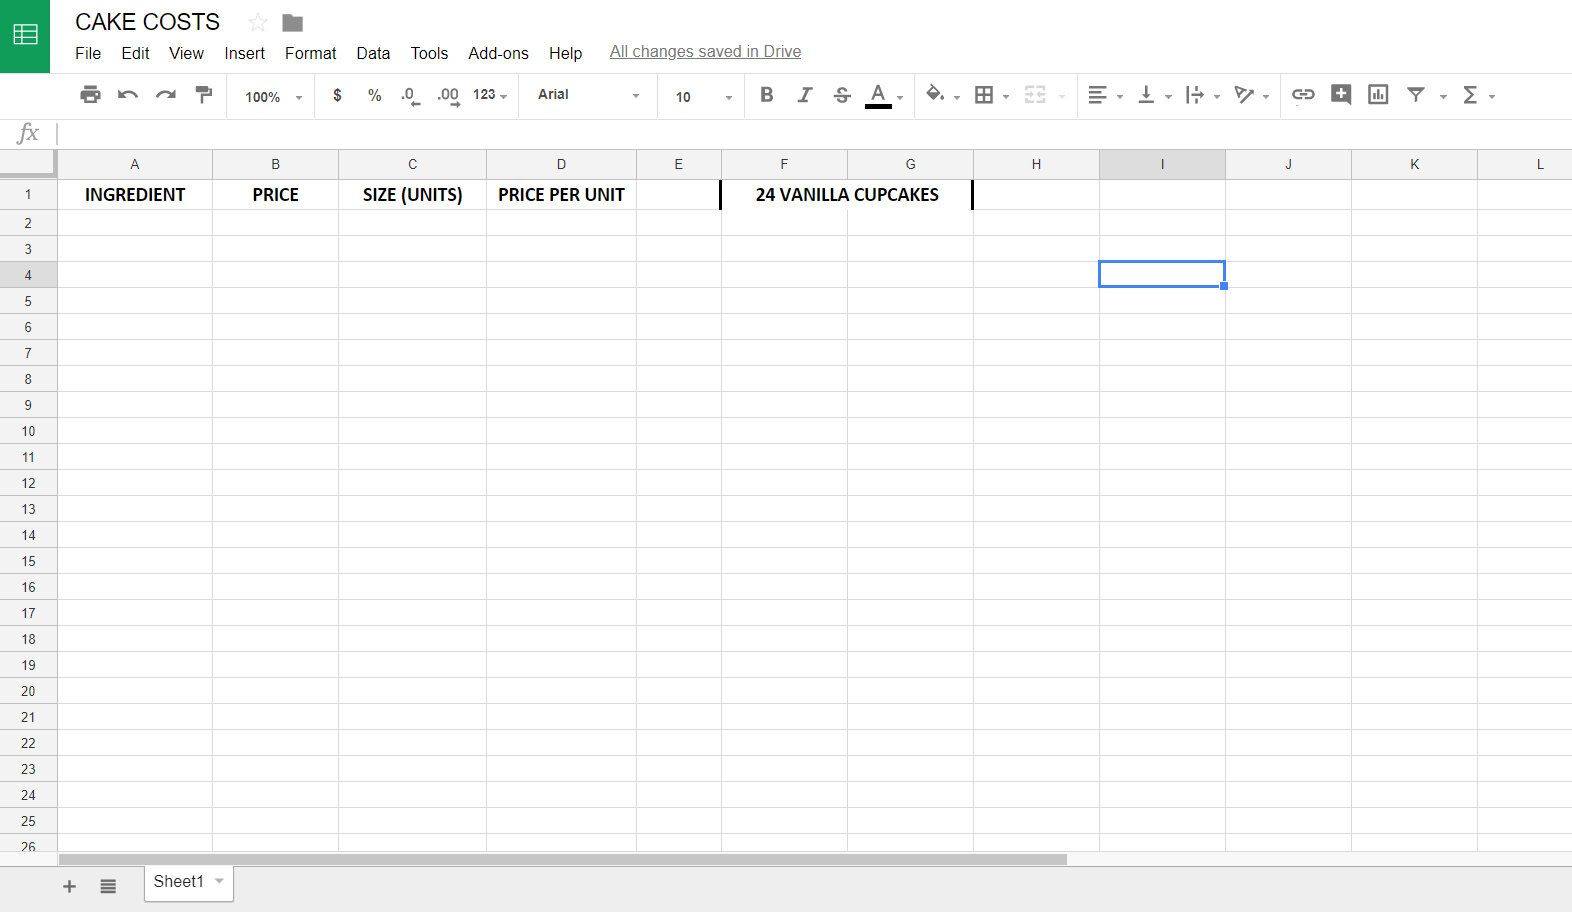
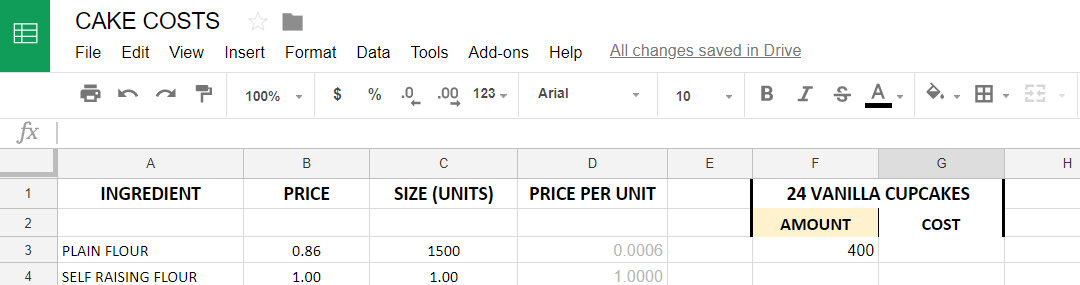
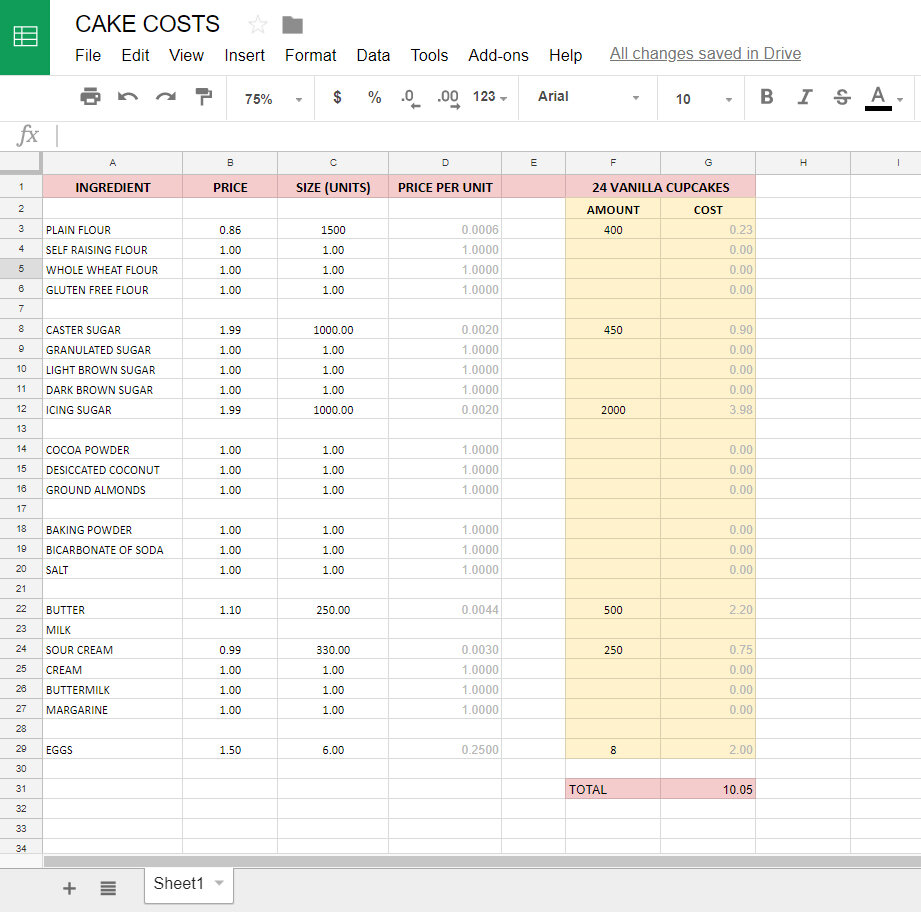
First we’re going to enter the different headings along the top. These are ingredients, price, size/units, price per unit, and the name of your product, in this case ‘vanilla cupcakes’. The product name will take up two boxes (cells), to do this, highlight the box you have written the name in, and the one to the right of it, select ‘Format’ in the menu above, then ‘Merge’ and ‘Merge Horizontal’.

STEP 3
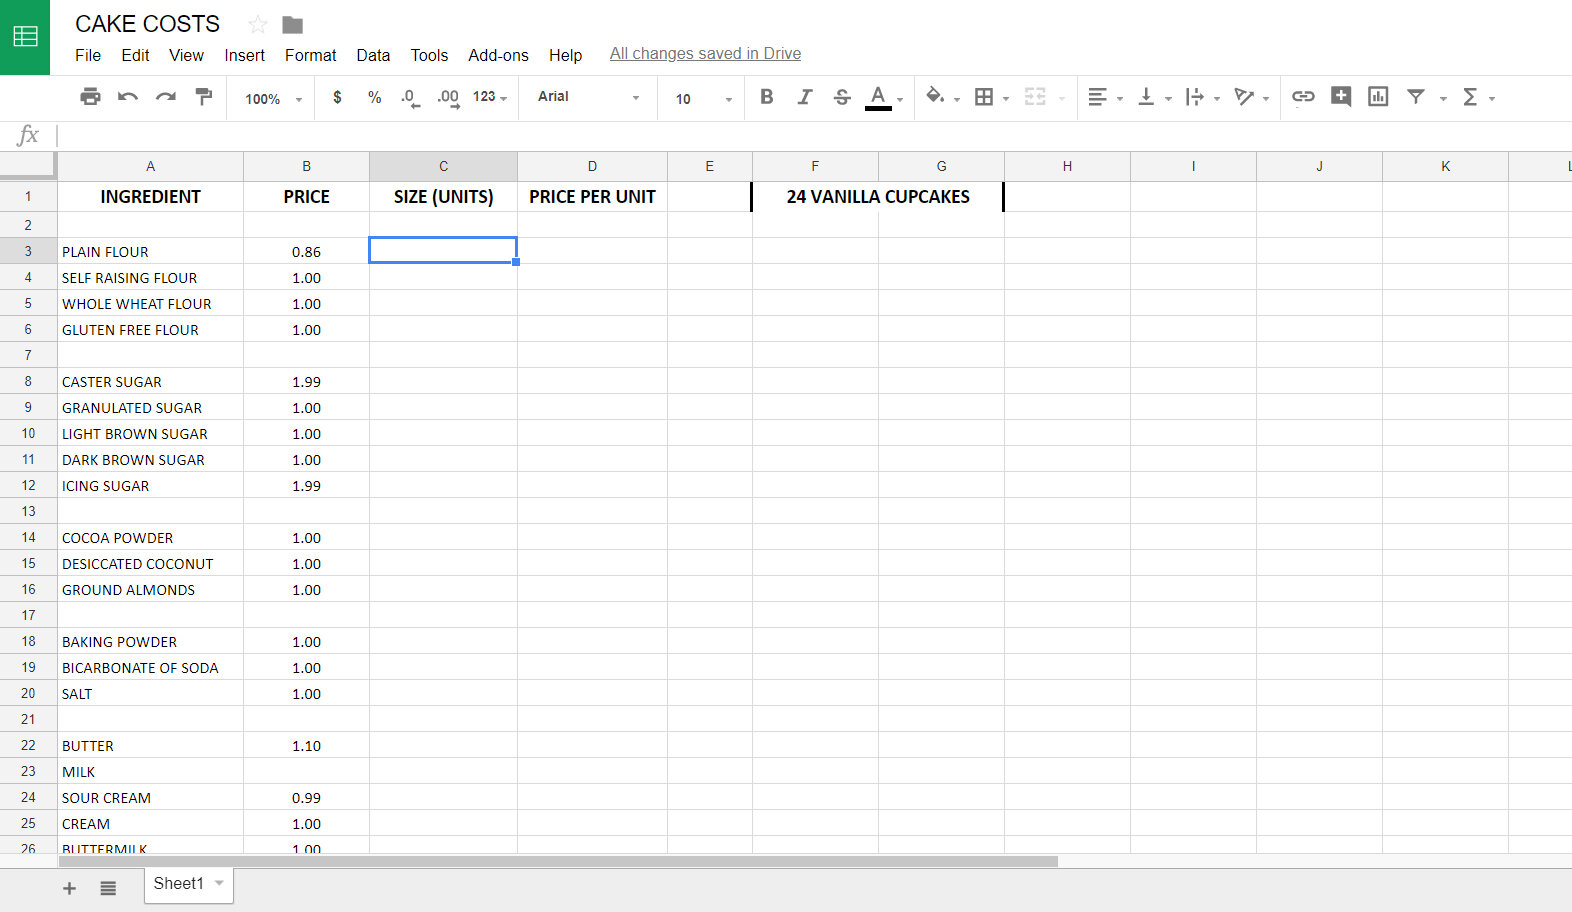
Under ingredients, enter the names of every ingredient you commonly use when you make your product. You can also include packaging items here, although for this example I’ve only used ingredients.
Then, in the boxes to the right, under price, enter what one package of that item would cost you. So, for example, the cost of one bag of flour, one bottle of vanilla, one box of eggs.
STEP 4
Moving along to the right, we are going to enter the amount that each packet contains. Now this step takes a little thought but it makes sense once I explain it with a couple of examples. Here you will want to enter the amount using the same units that you use in your recipe. So, if you measure your flour in grams, let’s say 450g of flour per cake, you would enter the size of one bag of flour in grams, usually 1500g. Be sure not to enter 1.5kg in this box, because if you don’t use the same units in this box as in the recipe box, your sums won’t work.
One more example. If you use 6 eggs per cake, you would enter the number of eggs per box, usually 6 or 12.
STEP 5
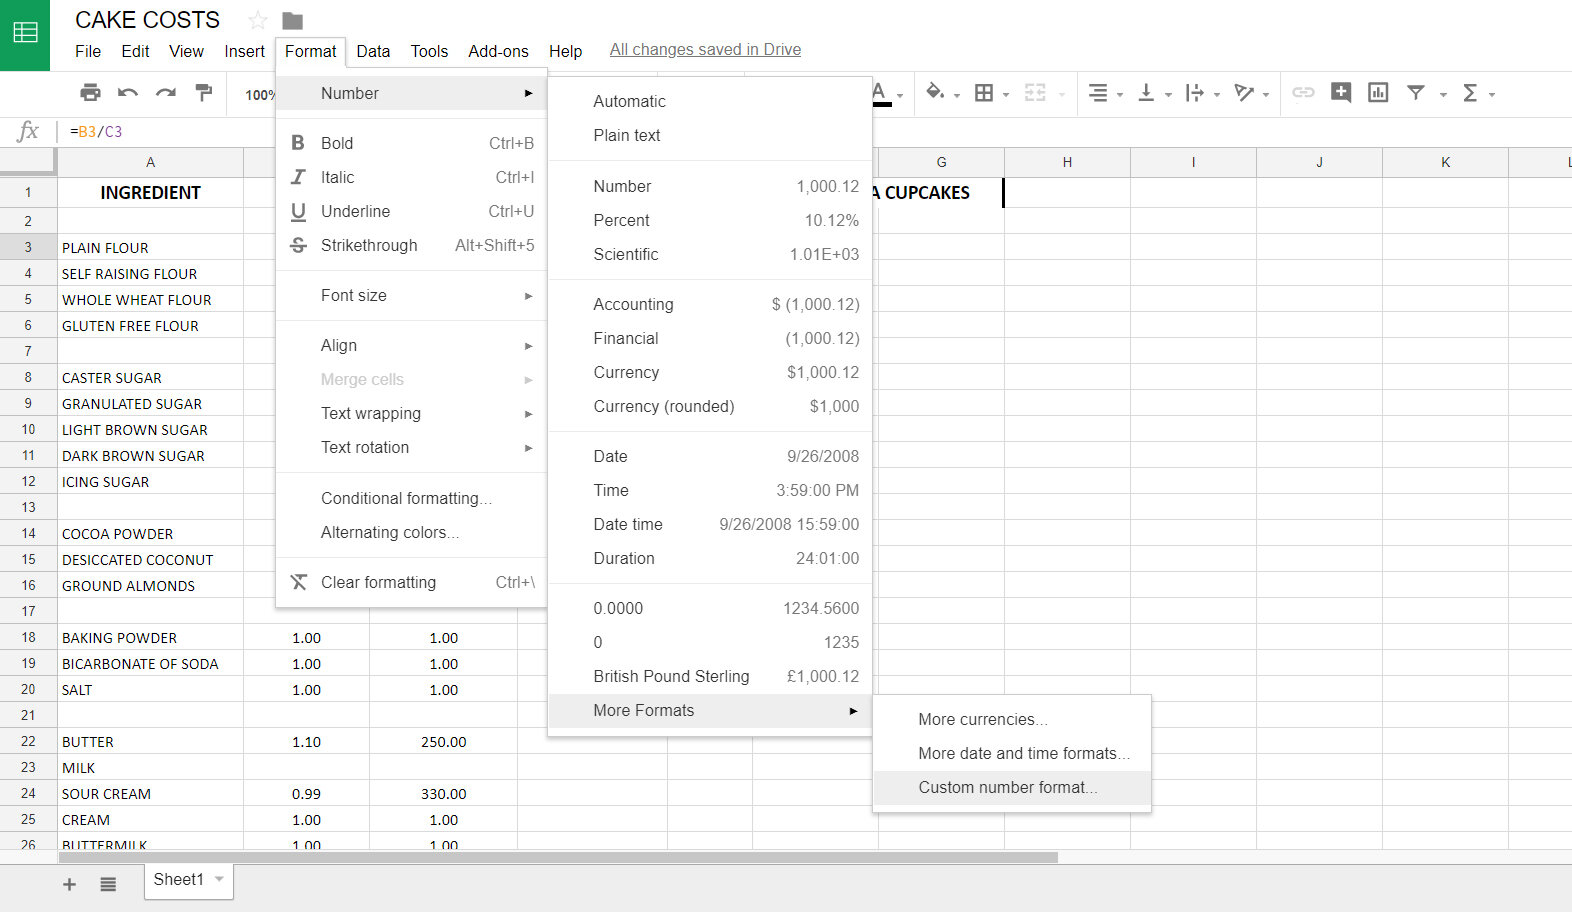
Now on to our first bit of maths. We need to know the price per unit, so how much 1 gram of flour costs, so that we can then calculate what 450g costs! To do that, we will divide the cost by the size. Luckily, we don’t need to do that ourselves!
Click the cell under Price per Unit. Just above the spreadsheet area there is a function line. Click in the box to the right of the function symbol (fx) and type and equals sign (=). Then click on the cell containing the price, type a backslash (/) for divide, and then click on the size/unit cell, and press enter/return.

If you just see zeros, don’t panic. The number is just too small to show up. With the cell still selected, click format > number > more formats, and in the box at the top enter ‘0.0000’ then click OK.

Now you’ve done that once, you just need to copy paste. Select the cell you’ve just created, and press ‘Ctrl + C’ to copy, highlight the cells below that you want to use and type ‘Ctrl + V’ to paste.
I like to change the colour of the cells that are being automatically calculated so I don’t get them confused. So highlight the full column, and select a colour of your choice.


STEP 6
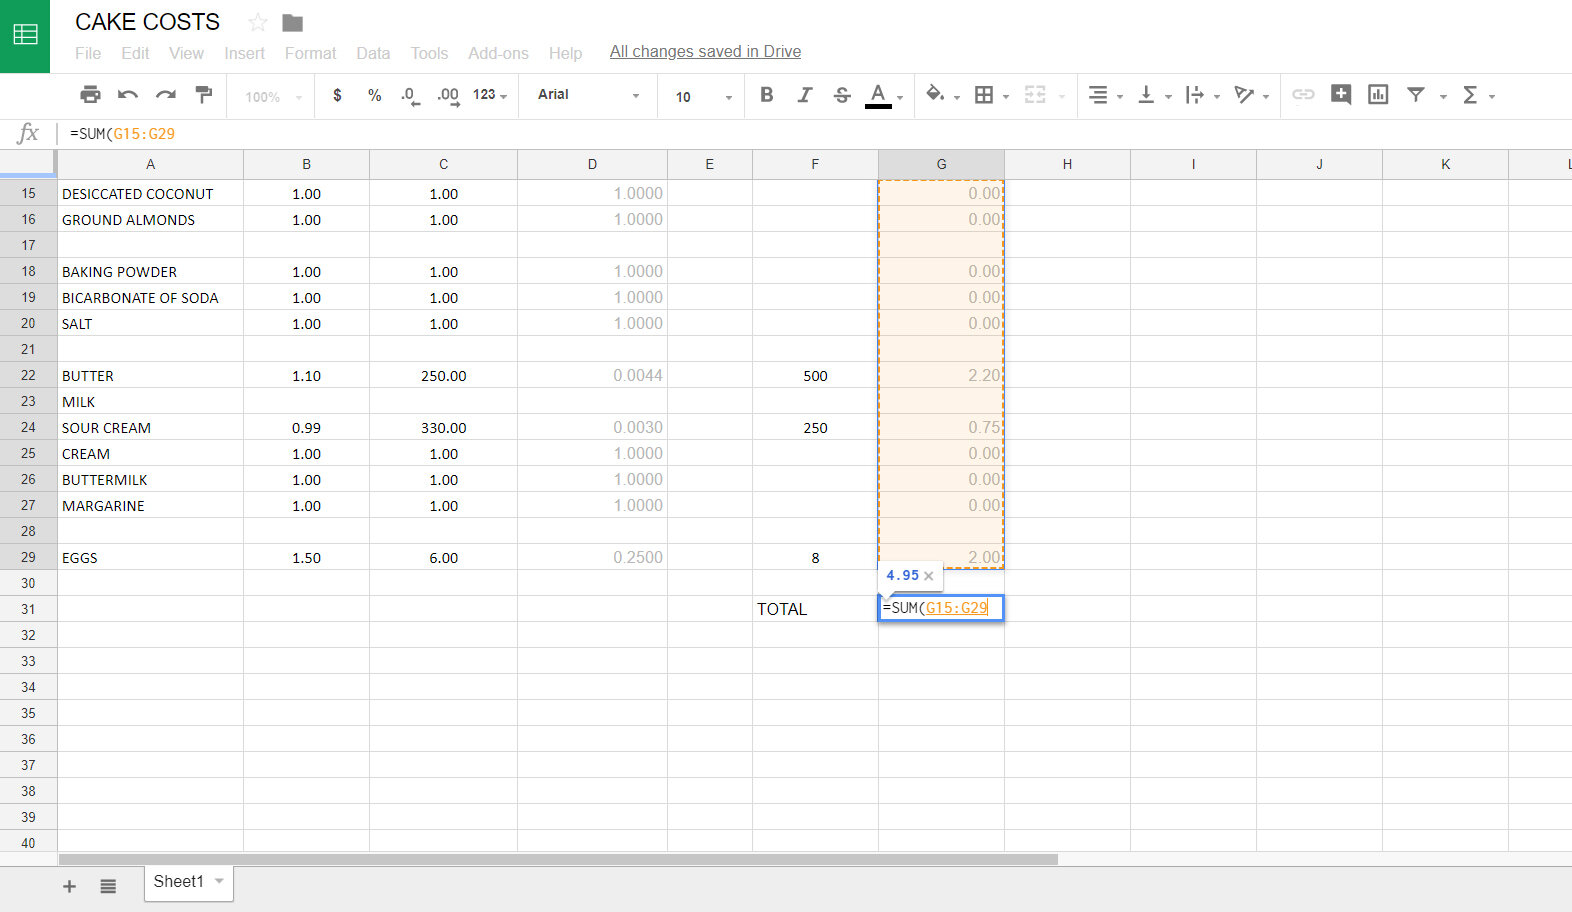
Now we are going to start entering to product specific values. Below the product heading, type 'amount' and 'cost' in each of the cells.
Under amount, type in the amount of that ingredient required for the recipe, in the same unit that you used before. For example, enter '400' if the recipe calls for 400g of flour.
Next we want to calculate how much that 400g will cost. Click the cell under cost and in the function bar type and equals symbol. Then click the amount cell, type a asterisk for multiply (*), then clock the price per unit cell and hit return/enter.

This will bring up the cost of that ingredient for this recipe. To format the number, as before, click format > number>number.
As you did above, copy this cell and paste into the cells below.

STEP 7
Now that you have generated all of the ingredients costs, the final step is to total everything up and find out how much one batch/order will cost you. Click a cell below all of your costs and type an equals symbol (=), then type 'SUM(' Once you've typed the open bracket you will be able to select the bottom cell of your costs, and drag it all the way to the top, highlighting the full column. Lastly type a close bracket ')' and press return. This should now show you the total amount.

STEP 8
Now you've created all of the complicated bits of the spreadsheet you can add some colour to make it a bit more pleasing to the eye. I like to add a coloured background to the area under the product name because this is the area that I will be using the most once everything else is set up.

I hope you found this helpful, but if you need any assistance get in touch using any of the links below.